Connecting the Brivo Controller to the Internet
Overview
The Brivo controller has the ability to connect to the
Internet using an Ethernet connection (recommended) or Wi-Fi. The following are instructions on how to implement each type of connection.
Identify the Type of Control Panel You Have
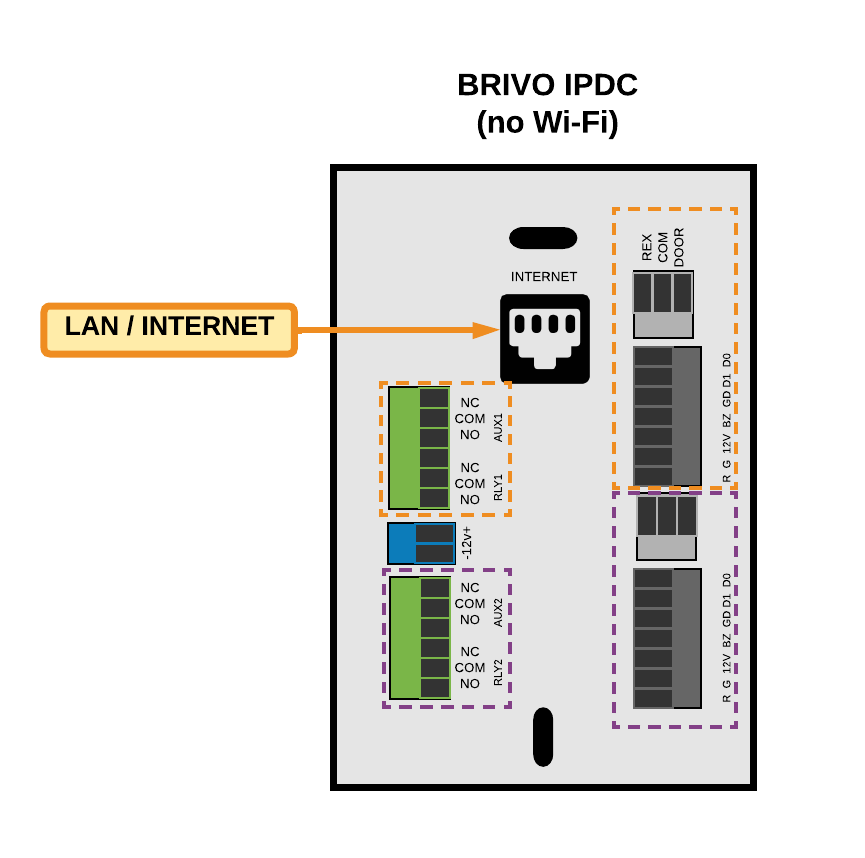 Brivo IPDC Internet Connection
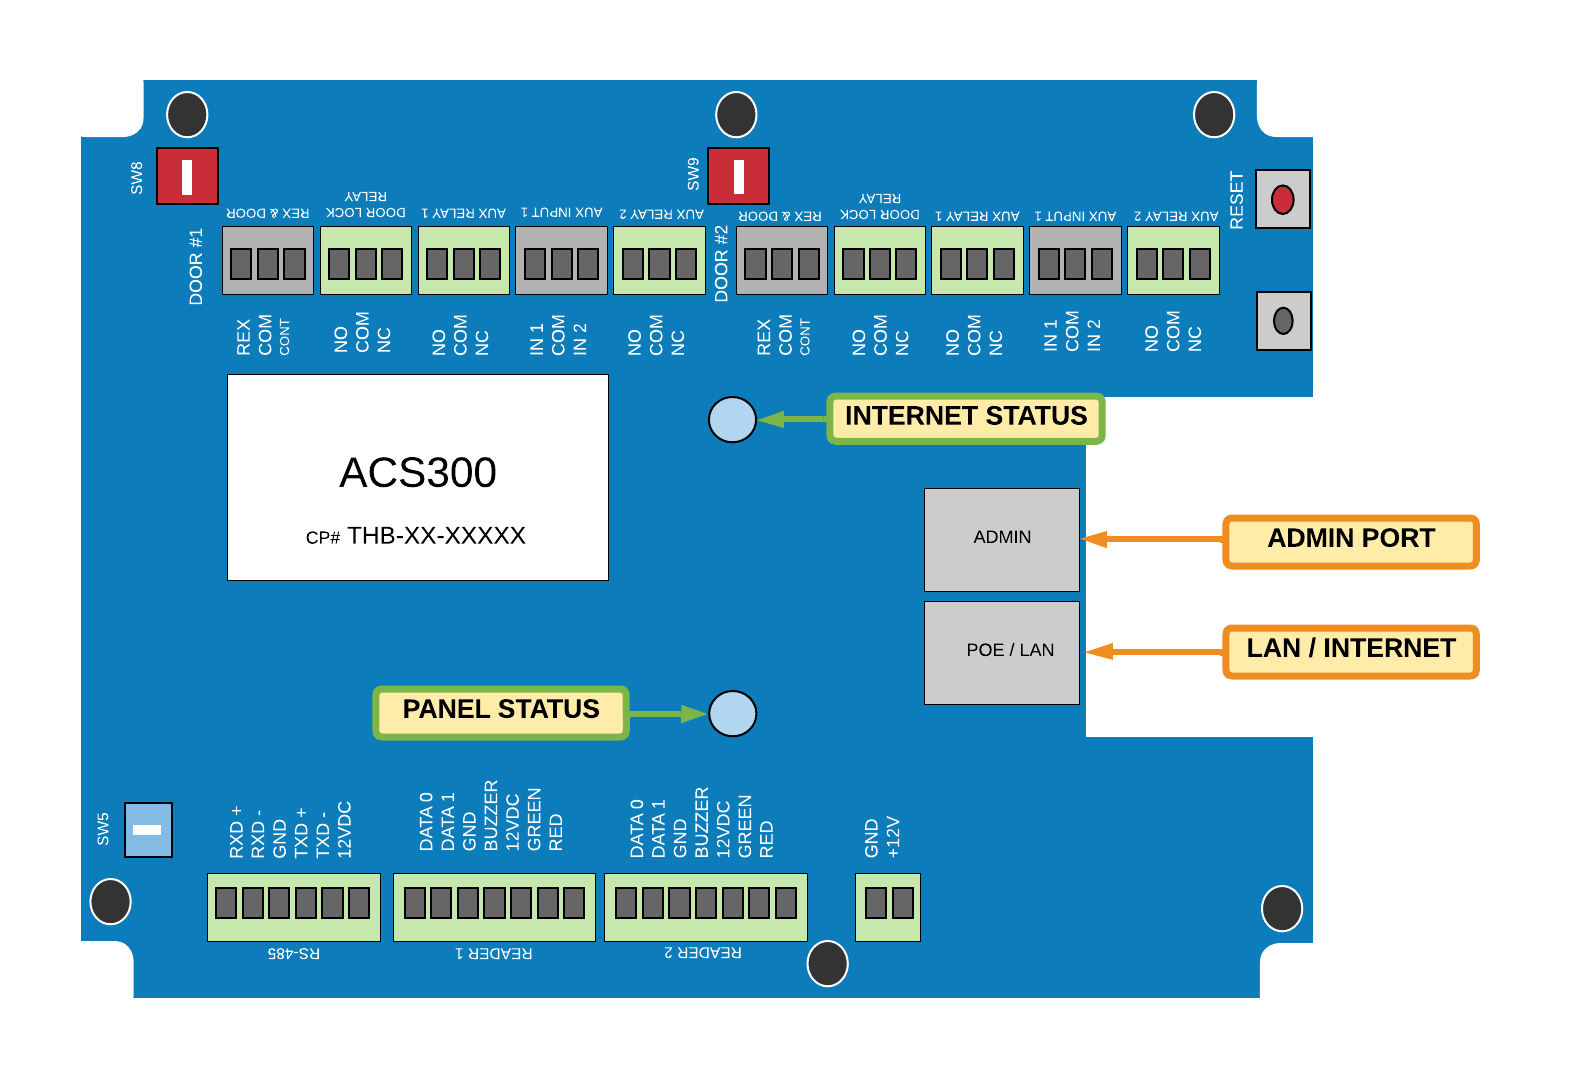 Brivo ACS300 Internet Connections
 Brivo ACS6000 Internet ConnectionsEthernet Connection
Connecting to Wi-Fi
Get Ready
- Computer (PC, Laptop, or Mac) with Ethernet (RJ-45) cable connection
- Ethernet patch cord
- The Brivo system must be powered on
Perform These Steps
- Deactivate the internet connection on the computer (disconnect from any Wi-Fi network, for example)
- Using the patch cord, connect the computer to the port
labeled ADMIN on the Brivo controller (see diagrams above to identify your controller)
- Open an Internet browser (e.g., Chrome, Firefox, Edge) and enter 192.168.207.1 in the address bar.
- A pop-up appears (if pop-ups are blocked, unblock them)
- Enter the username cli and the password new5cli
- Navigate to Networking >> WiFi
- Enable WiFi
- Enter the SSID (network name) EXACTLY as it appears - We suggest using the Scan Network button to select the network which ensures the SSID is correct
- Enter the Wi-Fi password EXACTLY as it is set up - it is case sensitive
- Click SAVE at the bottom of the page
9. Test the connection by navigating
to Networking >> Troubleshooting
10. The system will take about 30
seconds to diagnose the network connections and then the following output
appears. If there is a red FAIL listed, connecting to the Internet may
not be successful and further network diagnostics are required. For
example, check the SSID and/or Password, or verify that a firewall is not
blocking connectivity.